Friday, April 24, 2009

Carving the rabbet - Week 3

With the sternpost bolted to the rest of the backbone, we started week three by tapering the stern section of our now fully assembled keel. We mentioned last week that the bolts in this section had to be angled in towards centerline to allow for this tapering, but neglected to mention the reason behind it. This aftermost section is tapered to allow a clean flow of water to the prop. It also helps the rudder to be more efficient.

Once the taper is laid out on the keel, it's time to remove some material. A power plane is good for removing large amounts of material quickly.


And a smoothing plane is great for getting rid of the ridges left by the power plane and creating an event surface.


A little sanding to finish the job never hurts.


For the port side Tim, decided to do things the old fashioned way. There are few tools more rewarding to work with than a finely tuned hand plane. And just look at all those shavings.


Just a few more passed with the jointer plane to finish the job.


Nice.


Stepping back a little you get a nice look at what the finished taper looks like.


In addition to tapering the aft section of the keel, we're also working on laying out the rabbet. The rabbet is where the planking connects to the backbone. In a carved rabbet like the one we're doing on the catboat, a continuous notch is cut into the backbone to fit the planks where the two come together. Along it's entire length the rabbet is defined by two points: where the outside of the planking intersects the side of the keel (called the rabbet line) and the bearding line, where the inside of the planking and the side of the keel intersect. Before we can carve the rabbet, we must first have these two lines (rabbet & bearding) defined over the entire length of our backbone.

Luckily we already have the rabbet and bearding lines marked at numerous points along each of the individual pieces of the backbone. Now that they're all assembled, all we have to do is connect the points and check that everything's fair.

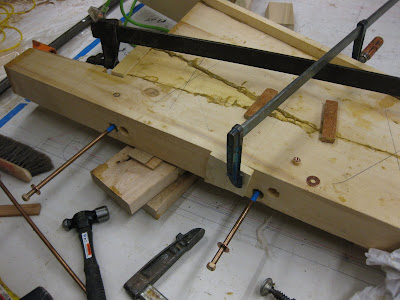
To get a fair line between all of our known points, we use a batten just like when we were working on the loft floor. But unlike in the loft we don't necessarily want to drive a lot of nails into the piece we're working on. We can eliminate most of the nails by using sticks to hold the batten at each of our points.


The sticks are cut to a point, so they work just like a nail would, defining the line at a single point. In a few spots we'll go ahead and use nails because we'll be carving away the material anyway.


The batten is carried all the way aft. In this picture we can see how the bearding line fairs in with the inner keel at the stern.


Because the rabbet determines where the planking falls on the backbone, we're careful to make sure that both sides are the same, especially at the stem where any irregularity will be especially noticeable.


Since we're aiming to have both sides be symmetrical, we're using a lot of points to define our curve at the stem.


The result? Looks fair from here.


As the lines run aft, it's just as important to make sure that they are hitting all the same points on both sides, but because the curve is much more graceful the batten doesn't need to be fixed in as many points.


Once our rabbet and bearding lines are laid out on the backbone, we're ready to start carving the rabbet. Rather than carving the rabbet continuously from stem to stern, we start by carving pockets every six to eight inches. The spacing of the pockets is closer together where the rabbet is changing a lot, and further apart where the rabbet is more constant. Once we've got pockets carved the entire length of the rabbet, we can go back and carve out the rest, fairing between the pockets. Here's a quick look at how it's done:

We start by defining our pocket. In order to keep a clean edge on the rabbet and limit tear-out, it pays to score the rabbet and bearding lines.


To determine the angle of our rabbet, we use a block that is the same thickness as our planking will be, known as a fid. While holding the inside edge of the fid on the bearding line (on the right in the picture), use another block, or any straight edge, to extend the outside edge of the fid to the rabbet line. Once the fid is angled so that the inside of the "plank" is on the bearding line and the outside is on the rabbet line, you've got the angle at which your planks will intersect the keel at that point.


Our pocket is then carved to allow the fid to be notched into the keel at the determined angle.


Once our pocket is carved, the outside face of the fid is touching the rabbet line and the inside face the bearding line. While the angle changes over the length of the backbone, determining that angle is done exactly the same.


Once the angle of the planking is determined using the above method, a bevel gauge can be used to "remember" the angle while carving as Tim is doing in the picture below.


Creating the rabbet is a little different at the inner keel. As you may remember an inner keel extends the back rabbet at the stern of our catboat. Along the rest of the length, we'll use cheek pieces to do the same thing. These cheek pieces will be installed after the rabbet is carved, but in the case of the inner keel, it has already been installed. To create the rabbet here, we use the same method to determine the angle of the planking, then using a rabbet plane, we can bevel our inner keel to match that angle.


Then using the inner keel as a guide, cut the rabbet.


There's still a little bit to go, but we'll wait till we've got the backbone on the building jig to finalize the rabbet.


When carving the rabbet, the first few pockets take a while...


But soon things go pretty quick.


Good thing too, 'cause there are a lot of them to do.


As we get most of the pockets carved, we can start fairing between them, and the rabbet starts to emerge.
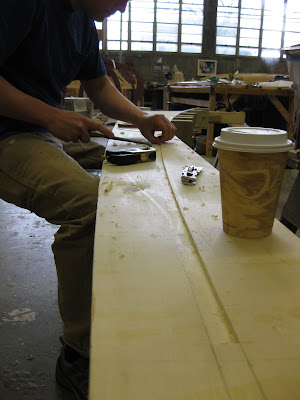


For the most part we're not worried about the ends of our pockets tearing out, because the material's going to be carved out anyway, but at the top of the stem you definitely want a clean edge. This is where the top of the steer strake will come into the stem, so you don't want to see a lot of tear-out here.


Not too shabby.


As the rabbet runs up the stem it gets a lot deeper 'cause here the planks are coming in at a much steeper angle.


We've almost got the starboard side done all the way.


Here's a nice look at the rabbet running forward.


Once the rabbet is carved far enough, we can start installing the cheek pieces I mentioned earlier. These pieces will extend the back rabbet (the surface contacting the inside of the plank) providing a greater surface area for fasteners. We've already made up these cheek pieces, so they're ready to be fastened on.


The bottom edge that will form the back rabbet has been beveled to minimize the amount we'll have to do once we've got it on the building jig.


As with the other parts of the backbone, we're using bedding compound between the cheek and the keel.


A few adjustments here and there, and we fasten it on.


All that's left to do now is clean up the squeeze-out.


Looks pretty cheeky. (Sorry.)


With the rabbet carved to the top of the stem, all that's left to do is...


Flip it over and start on the other side.


It's the same operation as the other side, so things go pretty quickly.


And so our third week of the quarter draws to a close with the rabbet almost complete.


Carving the rabbet is a bit of a milestone in wooden boatbuilding, not to mention a lot of fun. And once the rabbet is carved, planking isn't far behind. But that's a story for another time. First, we've got to finish this rabbet.

Friday, April 17, 2009

Keel continues & setup begins - Week 2

When we left off last week, we'd drilled for the first five bolts in the aft section of the keel timber. On Monday we began by drilling for the final bolts which proved to be the most challenging by far. These bolts couldn't simply be drilled straight down through the keel like the others because at this point the stern tube which houses the propeller shaft comes into play. At the top of the keel the bolts must be as far from centerline as possible so that they pass on either side of the shaft, but not so far that they interfere with the carved rabbet. And when they emerge through the bottom, they must be on centerline to allow the keel to be tapered. Also, because there are two bolts at each floor timber one must be angled slightly forward and the other back, so that they emerge one in front of the other rather than intersecting. If this all sounds a bit confusing, that's because it is. We spent far more time figuring out how to bore these holes than the other ones, but in the end they came out the bottom almost exactly as we'd hoped. We'll find out when we drill for the stern tube if we left enough clearance. But we'll save that excitement for another day. Now on to the rest of this week.

Once the final bolt holes were drilled, we were ready to assemble the after section of our backbone. After applying a little bedding compound to all the seams...


We could start driving in the bolts...


And don't forget a twist of cotton under each washer before driving them home.


We were debating whether or not to put the cotton in at this point since we're going to be removing these bolts when it comes time to bore through the real floor timbers, but we decided that it wouldn't hurt. And it would remind us to put the cotton back in the next time we're driving in these bolts.

For the holes we'd drilled on Monday, we still had to make up some temporary floor timbers for the bolts to land on. The holes through these floor timbers had to line up just right. The easiest way to do this is just to clamp the floor timbers on and bore up through the existing hole and through the floor timber. Perfect every time.

Here we have a couple bolts driven partway in to index the pieces. We were most worried about the smaller deadwood piece (small triangle with all the squeeze-out around it) moving when we started to bore, but having all the pieces indexed helps keep everything lined up the way you want it.


Here you can see the temporary floor timbers clamped to the inner keel waiting for the auger to do its work.


Here's a good look at the whole operation. You might also get a better idea of why those last few holes made us scratch our heads a bit. Not really a good time to just sight down the bit to get the hole you're after.


Here goes Tim on the auger.


This looks like an extreme operation, but the auger will follow the existing hole pretty much effortlessly, so as long as the floor timbers stay clamped on, there's now too much to worry about here.

Just don't hit the clamps on the other end with the auger...


Plenty of room.

Once we had the two remaining floor timbers bored it was just a matter of driving in the last of the bolts and tightening them all up. And a little clean-up too...


Not a bad result.


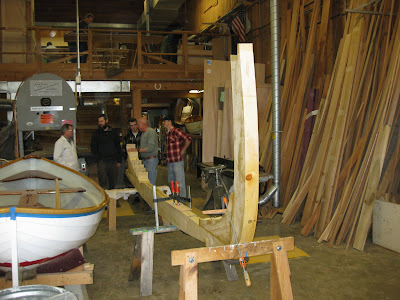
So far we've been doing all this fitting up on the loft floor, but now it's time we move down to the shop floor. Up until this point we've been hauling the pieces up the stairs, but that won't be feasible now that we've got everything bolted together. What we decide to do was cut away part of the loft railing and just ease it down to the shop floor. A simple operation but one that needs a bit of manpower. For this we enlisted our lofting class. Here in the boatbuilding department you begin your first quarter in the loft, so this is only the second week in the shop for these students. It was a good opportunity to get them involved in what's happening on the shop floor below and they were all happy to lend a hand.

So here we go...


Watch the ventilation, Jonas...


Ease it down...


Little more...


"Have you got it down there?"


And set it down gently...


Success! As I said, an easy task when you have enough people lending a hand. Thanks everyone!


With the backbone now safely down on the shop floor, Tim started on the stern post, which we hadn't fastened on in the loft. The sternpost is notched (as you see in the photo) to hold the transom.


The stern post is held on with a few different pieces of hardware. The rectangles drawn on the piece in this picture represent bronze straps that will be countersunk and fastened into the side of the deadwood/sternpost. These bronze straps may or may not be temporarily attached before we taper this section.


The sternpost will be primarily attached using two bolts. The upper bolt goes through the last floor timber and a knee before going through the stern post. At the top of the next picture you can see the knee in place behind the floor timber with the bolt hole drilled through it. You can also see towards the bottom a hole through the side of the deadwood. This is the second bolt, known as a pocket bolt. The blot will pass through the whole in the end, while the hole in the side allows you to get the nut onto it. Once the hole is plugged, you'll never know it's there.


While Tim worked on the sternpost, Jonas began the building jig which you can see the start of in the photo below. We'll see more of that later, but for now, we'll stay with the backbone and look at the cheek pieces that I've been working on. You can see the beginning of two of the pieces to the right in this picture.


Here they are with the pattern clamped on.


Do you recognize the pattern? Yes, it's same pattern that we used before for the keel. That's the great thing about saving your patterns. You can use the same pattern for different things and by using the same one rather than making a new one each time, you know that the pieces you're making will match. Not much room for error when you use the same pattern.


The cheek pieces that I'm making will be fastened to the side of the keel to extend the back rabbet. Just like we talked about with the inner keel at the stern, the cheek pieces create a larger surface into which to fasten the planking along the keel and stem. This will be clearer once we've carved the rabbet and you can see how it all comes together.

Here you see the two longest cheek pieces cut out. These will run from the inner keel to the stem knee. The cheek pieces will fair in with the inner keel to create a single fair curve.


Here you can start to get an idea of the graceful line of the planking as it sweeps aft.


With the two midships cheek pieces now fit, you get an idea of the true bulk of the backbone. And we thought it was heavy when we brought it down from the loft. Wait till we go to set it on the building jig!


Moving on to the stem cheeks, the first step was to lay out our waterlines on the stem so that we have a point of reference. With the waterlines as reference we go back to the loft to find the bearding line along the stem. The bearding line is the inside of the planking at the side of the stem, so this the line that the cheek pieces line up with.


To take the measurements for the bearding line you could use a tape measure, but an easier way is to use a tick stick, also called a story stick. With a tick stick you simply line up the stick along the line you're measuring, in the photo below it's the 30" waterline. Starting with the stick at the forward face of the stem, simply make a mark at the bearding line.


Then take your tick stick to the piece you're laying out and line it up along the same waterline, and make your mark. It couldn't be much easier, or more accurate than that.


With the bearding line layed out on the stem we can make some patterns for the stem cheek pieces. Here's the rough shape the cheek pieces will take.


Once the patterns are layed out use a batten to get a nice fair line. Since the final edge of the cheek piece will be based on the bearding line on the keel this cut will be left proud, but it should still be cut roughly to shape.


Here are the cheek piece patterns on the stem. The middle piece just needs to be faired in with the other two.


After milling the stock, it's just a matter of tracing the patterns and cutting out your pieces.


And the result.


The top edge along the knee will be faired into a curve later, but for fitting, keeping those edges straight makes things much easier.

Now what's Jonas been up to all this time. Lets take a look.

Here's the building jig that he's been constructing nearly complete with the sawn frames waiting to be set up.


And with the morning sun shining through the shop windows, the set up begins. When initially setting up the frames, your chief concern is getting them all lined up evenly fore and aft along the centerline. Here having our centerline marked on the cross-spalls really helps.


It's starting to come together. Here's station 2 set up. The cross-spall that I mentioned is the piece of pine that is resting on the top of the building jig between the two frames. These are all fastened to the frames at the same height so that when they're all set up on the building they'll be at the correct height to each other. The piece at the top, where the sawn frames come together, is the floor timber. These will be fastened to the keel to hold everything together.


The more stations that go onto the building frame the more the shape of the boat starts to emerge.


We're almost to the widest point in the boat. Only station 10 is wider. Did we mention that this is a beamy little boat?


Attaching the frames to the building jig is pretty straight forward, but getting everything just right takes a lot of checking and re-checking.


As the boat grows people can't help but smile when they see it. I think Jonas' smile is the biggest though. Dreams of gunkholing through the San Juans no doubt. Hopefully the boat will be right-side up then though.


With all the frames set up, she's already looking pretty fair.


Not much you can say. I mean, just look at it. Awesome.


Even the keel can't stop staring at those lovely frames.


It's been another good week. I can't wait to see what she looks like with the keel on top of those frames.